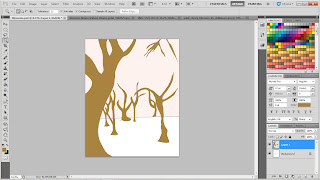
Finalize Artwork @ Sunday, 1 April 2012
Artwork Title: Lanterns
Visual Treatment
Art Movement: Fauvism and Colour Field
Reference Artist: Henri Matisse
Theme Chose: Family, Hope and Dreams
Idea & Concept: Have you ever wonder what lanterns looks like? So bright in the sky lighting through our lives, like hopes and dreams. Family who lit up the lanterns to shine into our lives, finding us who lost our way, just like the fairy-tale Tangled, sending hopes in the skies, hoping to find the lost one while the lost one sees the lanterns as dreams.
Idea & Concept: Have you ever wonder what lanterns looks like? So bright in the sky lighting through our lives, like hopes and dreams. Family who lit up the lanterns to shine into our lives, finding us who lost our way, just like the fairy-tale Tangled, sending hopes in the skies, hoping to find the lost one while the lost one sees the lanterns as dreams.
Artwork Title: Blossoms
Visual Treatment
Art Movement: Fauvism and Colour Field
Reference Artist: Henri Matisse
Theme Chose: Family, Hope and Dreams
Idea & Concept: Everything in life must grow. Family grows when you have different individuals coming together, hope grows when there is a way, dreams grows when you dream even bigger but all these has something in common which is you need to make an effort to protect it.
Artwork Title: The Hills
Visual Treatment
Art Movement: Fauvism and Colour Field
Reference Artist: Henri Matisse
Theme Chose: Family, Hope and Dreams
Idea & Concept: Mountains can be seen as obstacles and things go haywire at times like the green grass besides the mountains but the moon is represented as the hope while stars are seen to be dreams in the sky. Family plays an important role in supporting us through obstacles and helping us to work towards our dreams and hopes.
Student ID: B1000912
Labels: HAA102
Technical Execution- The Hills @ Saturday, 31 March 2012
P/S: Apologize for not many screen captures since I was running out of time.
1. First, I created a new can vas(16x20 inces, 300dpi), then transferred my sketch from the document and I did some lines cleaning on my sketch.
2. I used the magic wand to select the area that I wanted and then using the brush tool to paint the areas with different shades of brown and green.
3. I then google the texture for my sketch and applied it by overlay.
4. Then I filtered it (Paint daub) and blur it (Smart blur)
5. I moved on to my moon. I used the magic wand to select the moon and using a brush tool to paint the moon.
6. then I googled an image of a moon and desaturated the color and overlay it on my sketch.
7. The i used the same technique that used in the mountain on the moon.
8. Later, I used the magic wand to select the background and used a brush tool to color it dark blue to create an illusion.
9. A starry image is desaturated and overlay at the back ground.
10. The final product
Labels: HAA102
Technical Execution- Blossoms @ Friday, 23 March 2012
P/S: Apologize for not many screen captures since I was running out of time.
1. First, I created a new canvas (16 x20 inches, 300dpi), the transferred my sketch from the document and I did some lines cleaning on my sketch.
2.I google some flowers and placing them over by duplicating the layers.
3. Then I filtered it (brush strokes; angled strokes and dark strokes) then I blurred it (Smart blur and surface blur)
4. I used the magic wand to select the areas that I wanted and using a pain bucket to color them.
5. Then I merge the layers together
6. After merging, I put the layers together to color burn to bring out the colors of the blossoms.
7. Next, I google pictures of branches and tree trunks and I cropped them out
8. I duplicated the branches and using subtract to fit them with the blossom.
9. I uses the filtered same as how I did to the blossom to my tree trunks and later I blurred it with motion blur to create and illusion.
10. This is the up close effect.
11. I also google images of grass and crop them and repeated the steps with the blossom and tree trunk.
12. Here is the final look of Blossoms
Labels: HAA102
Technical Execution- The Lanterns @ Monday, 19 March 2012
P/S: Apologize for not many screen captures since I was running out of time.
1. First, I created a new canvas (16x20 inches, 300dpi), then I transferred my sketch from the document and I did some lines cleaning on my sketch.
2. I used the magic wand to select the area which I wanted and using a brush tool to color the respective areas.
3. I also uses the lasso tools to create the curve lines on the boat by using different shades of brown with pain bucket with different opacity
4. I used the magic wand to select the lantern's area that I wanted and used the pain bucket to color the selected areas.
5. I selected a texture that I want for my boat and I overlay it on top of the boat.
6. I used the lasso tool to create a curve and paint bucket to put on shades for the lanterns.
7. On the lanterns, I found the bokeh texture and I desaturated the color and put them with the lanterns by using soft light.
8. A starry back ground is added with overlay
9. The texture are later filtered (Filter, Artistic, paint daub) and blur (Smart Blur)
10. Magic wand is used to select the background area and different shades of brown are used to make the art more sharp.
Labels: HAA102


.jpg)


